Rediscover Childhood Joy with Small Batch Lunch Lady Peanut Butter Bars
There's a certain magic that happens when a simple treat transports you straight back to the carefree days of childhood. For many, that magic comes in the form of a rich, creamy, and utterly irresistible peanut butter bar, often affectionately dubbed a "lunch lady" specialty. While the school cafeteria version might have been a massive sheet pan affair, designed to feed an army of hungry students, we’re bringing you the ultimate nostalgic indulgence in a perfectly scaled-down format: the small batch peanut butter bars. These no-bake delights capture all that beloved flavor and texture, but in an amount that’s just right for a cozy night in, a spontaneous craving, or a delightful treat for two to four.
Imagine a confection that perfectly balances the salty allure of peanut butter with the sweet embrace of chocolate, all without ever needing to turn on your oven. That’s precisely what these incredible small batch peanut butter bars deliver. They're quick to assemble, require only a handful of common pantry ingredients, and promise a taste experience that feels both familiar and wonderfully special. Forget the massive, intimidating recipes; this reduced-size version ensures you can enjoy that classic flavor without commitment to an entire dessert marathon.
The Enduring Appeal of the "Lunch Lady" Legend
For those fortunate enough, the words "lunch lady peanut butter bars" conjure images of a soft, decadent square, topped with a smooth layer of chocolate, often served alongside a wholesome (or not-so-wholesome) school lunch. While not every school cafeteria across the nation boasted this particular confection, its legend has grown through word-of-mouth, inspiring countless home bakers to recreate that unique taste of nostalgia. These weren't just any peanut butter bars; they were often seen as a highlight of the school week, a reward that made navigating algebra or history class a little sweeter.
The beauty of these lunch lady-inspired treats lies in their unassuming simplicity. They're not gourmet or elaborate, but rather honest, homemade comfort food at its finest. The original recipes, crafted for institutional kitchens, involved vast quantities – melted butter by the pound, bags of powdered sugar, and industrial-sized tubs of peanut butter, all spread across giant sheet pans. The sheer scale made them seem unapproachable for the average home cook.
However, the desire to relive those memories, or to experience them for the first time, has driven a delightful culinary movement towards recreating these iconic desserts in a more manageable format. This is where the concept of small batch peanut butter bars truly shines. We take all the essence of that beloved school treat – the rich, creamy peanut butter base, the subtle crunch from graham crackers, and the luscious chocolate topping – and distill it into a recipe that’s accessible, quick, and yields just enough to satisfy that specific craving without excess.
Why Small Batch is the Smart Batch for Your Sweet Tooth
In today's world, where mindful consumption and portion control are increasingly valued, small batch recipes have become a culinary godsend. Especially when it comes to indulgent desserts like peanut butter bars, scaling down a recipe offers numerous advantages:
- Perfect Portions: No more massive trays of sweets tempting you for days. A small batch yields just enough for 2-4 people, making it ideal for couples, small families, or even an individual who wants to avoid overindulging.
- Reduced Waste: Less ingredients mean less potential for leftovers going stale or uneaten. You get to enjoy fresh dessert every time you make it.
- Quick Gratification: Smaller quantities often mean faster assembly and chilling times. You can go from craving to confection in under an hour with these small batch peanut butter bars.
- Ingredient Efficiency: You won't need to buy large quantities of ingredients that might sit unused. Most small batch recipes rely on modest amounts of common pantry staples.
- Experimentation Without Commitment: Want to try a new flavor twist or a different type of chocolate? A small batch allows you to experiment without committing to a full-sized dessert.
This approach perfectly aligns with the ethos of these particular peanut butter bars: simple, satisfying, and designed for immediate enjoyment. They strike that perfect balance, delivering rich flavor without overwhelming your fridge or your willpower. You can learn more about making these easy, classic treats in our article: Rich & Easy Small Batch Peanut Butter Bars from Pantry Staples.
Crafting the Irresistible Layers: Ingredients and Insider Tips
The magic of these small batch peanut butter bars lies in their distinct layers, each contributing to the overall harmonious flavor and texture. With just a handful of ingredients, you can recreate this iconic treat. Let's delve into what makes each component crucial:
The Creamy Peanut Butter Base: Foundation of Flavor
- Creamy Peanut Butter (Not Natural): This is perhaps the most critical ingredient. For the signature smooth, firm, and easy-to-cut texture, creamy, processed peanut butter (like Jif or Skippy) is essential. Natural peanut butter, with its oil separation and typically thinner consistency, will result in a greasy, crumbly, or overly soft bar that won't set properly. The added sugar and stabilizers in conventional peanut butter are key here.
- Graham Cracker Crumbs: These provide the necessary bulk, a subtle honeyed flavor, and a pleasant, slightly gritty texture reminiscent of a pie crust. They bind with the other ingredients to form a cohesive, yet soft, base.
- Powdered Sugar (Confectioners' Sugar): Crucial for both sweetness and texture. Unlike granulated sugar, powdered sugar dissolves seamlessly into the mixture, ensuring a smooth, melt-in-your-mouth consistency without any grittiness.
- Melted Salted Butter: The binding agent that brings everything together, adding richness and helping the bars set. Using salted butter also subtly enhances the peanut butter flavor, providing that delightful sweet-and-salty contrast. If you only have unsalted, a tiny pinch of extra salt will do wonders.
The Decadent Chocolate Topping: The Perfect Finish
- Good-Quality Semi-Sweet Chocolate Chips: While any chocolate will melt, using a good quality brand truly elevates the topping. Semi-sweet chocolate offers a balanced sweetness that complements the peanut butter without being overly cloying. Dark chocolate can also be an excellent choice for those who prefer a less sweet profile, while milk chocolate will create a richer, sweeter top layer.
- Additional Peanut Butter (Optional, but Recommended): A small amount of peanut butter mixed with the chocolate chips during melting creates an incredibly smooth, glossy, and softer chocolate layer that won't crack when you cut the bars. It also adds an extra layer of peanut butter flavor, deepening the overall experience. This simple trick is an absolute game-changer for consistency and taste.
The Art of No-Bake: Simple Steps for Sweet Success
One of the most appealing aspects of these small batch peanut butter bars is their no-bake nature. This means minimal fuss, fewer dishes, and a faster path to deliciousness. The process is remarkably straightforward:
- Combine the Base Ingredients: In a single bowl, you’ll mix the melted butter, graham cracker crumbs, powdered sugar, and creamy peanut butter. Stir until a uniform, thick mixture forms. It should be cohesive enough to press into a pan.
- Press and Chill the Base: Transfer this mixture to a small, ungreased dish (a 7x5-inch pan is ideal for the perfect thickness). Use the back of a spoon or your fingers to press it firmly and evenly into the pan. A quick five-minute stint in the freezer helps it firm up rapidly, creating a stable foundation for the chocolate.
- Melt the Chocolate Topping: In a microwave-safe bowl, combine your chocolate chips and the optional (but recommended) extra peanut butter. Microwave in short bursts (e.g., 30 seconds, then 15-second intervals), stirring well after each, until the chocolate is smooth and glossy. Avoid overheating, as this can cause the chocolate to seize.
- Assemble and Refrigerate: Pour the melted chocolate mixture over the chilled peanut butter base. Spread it evenly to create a beautiful, smooth layer. Then, the hardest part: patience! Refrigerate the bars for at least one hour (or ideally, slightly longer) to allow both layers to set completely before cutting into squares.
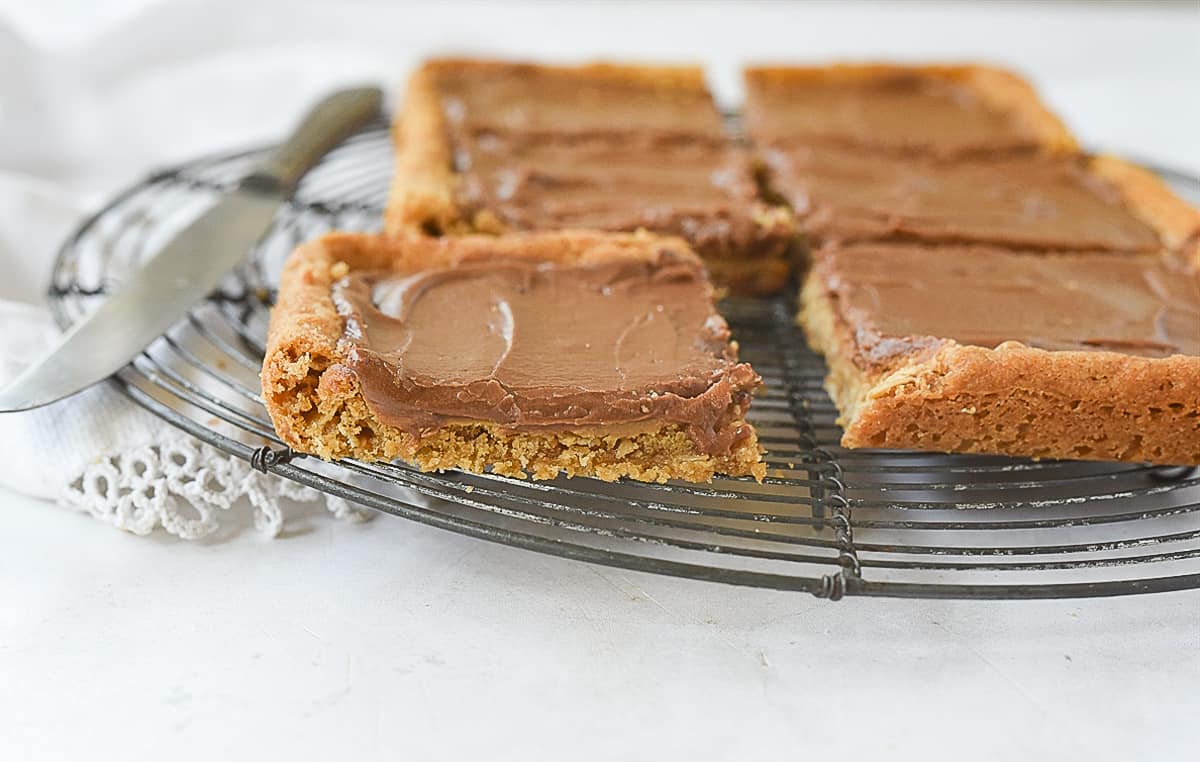
The result is a perfectly layered treat, ready to slice and serve. The clean lines and distinct layers make these bars as visually appealing as they are delicious, proving that simple doesn't mean sacrificing sophistication.
Personalizing Your Peanut Butter Bars: Beyond the Classic
While the classic lunch lady style is undeniably perfect, these small batch peanut butter bars offer a fantastic canvas for personalization. Here are a few ideas to make them uniquely yours:
- Toppings Galore: Before the chocolate sets, sprinkle with flaky sea salt (highly recommended to enhance flavors!), mini chocolate chips, chopped peanuts, sprinkles, or even a drizzle of caramel or white chocolate.
- Chocolate Varieties: Experiment with different types of chocolate for the topping. Dark chocolate will offer a more intense, less sweet contrast, while milk chocolate will create a creamier, sweeter profile. White chocolate can also be used for a different aesthetic and flavor.
- Extracts: A tiny drop of vanilla extract or even a touch of almond extract can be added to the peanut butter base for an extra layer of flavor complexity.
- Crunch Factor: If you enjoy more texture, consider mixing a tablespoon or two of chopped roasted peanuts into the peanut butter base or sprinkling them on top of the chocolate.
These variations allow you to tailor the classic treat to your specific taste preferences, ensuring that every batch feels like a bespoke creation.
Storage and Enjoyment Tips
Once your small batch peanut butter bars are perfectly set, they are ready to be devoured! For optimal texture and flavor, store them in an airtight container in the refrigerator. They will remain fresh and delicious for up to a week. If you find yourself with more than you can eat in that time (unlikely, given how good they are!), they can also be frozen for up to a month. Just be sure to separate layers with parchment paper to prevent sticking.
Serve them chilled, allowing the flavors to truly meld and the textures to remain perfectly firm yet yielding. Whether enjoyed as an afternoon pick-me-up, a comforting dessert after dinner, or a sweet treat shared with loved ones, these bars are guaranteed to bring a smile to anyone's face.
The appeal of the lunch lady peanut butter bar endures because it taps into a universal love for simple, honest, and utterly delicious treats. By scaling down the recipe to a small batch, we not only make it incredibly accessible but also allow for a more mindful indulgence. These no-bake wonders prove that you don't need an elaborate recipe or a full day in the kitchen to create something truly special and deeply satisfying. So go ahead, whip up a batch, and let these delightful peanut butter bars transport you back to a time when the sweetest things in life were often found right on your lunch tray.
